


It appears that a lot of Minecraft players are getting an error while launching and updating the Minecraft launcher. The error is so frustrating so that players are unable to launch the game. Several Minecraft players are getting Unable To Update The Minecraft Native Launcher error when the Minecraft launcher tries to update.
So, if you are also getting the Unable to update the Minecraft Native Launcher error while launching the Minecraft launcher then this post is going to help you to fix this error. Keep reading the post below where I have given a step-by-step guide on how to fix the Unable To Update The Minecraft Native Launcher error.
How to Fix Unable To Update The Minecraft Native Launcher Error?
To fix Unable To Update The Minecraft Native Launcher error follow the tesp below.
Step 1 – Reset Minecraft Launcher
The first thing you can try to fix the Unable To Update The Minecraft Native Launcher error is to reset the Minecraft launcher on your Windows PC. Now, to reset the launcher follow the steps below.
- Go to Windows search bar and type in Apps and Features and hit enter
- Now, under apps and features click on the search bar and type in Minecraft Launcher
- Now, left-click on Minecraft Launch and then click on Advanced options
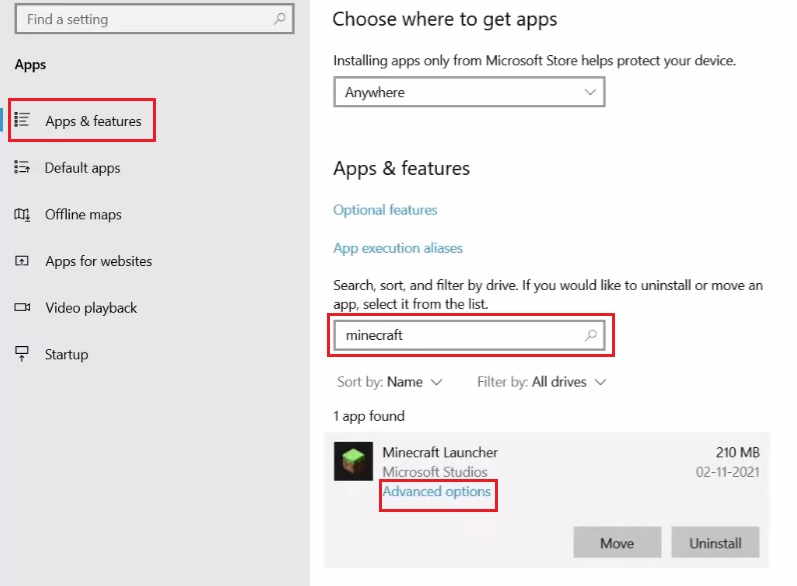
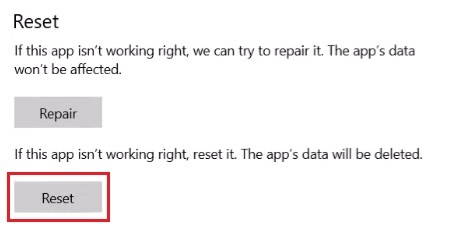
- Now scroll down and click on the Reset option, that’s it.
Now, go and launch the Minecraft Launcher, and now it should update and launch without the Unable To Update The Minecraft Native Launcher error.
If you are still getting the same error message then try the second step below.
Step 2 – Uninstall Minecraft Launcher and Reinstall
If resetting the Minecraft Launcher app doesn’t work then you can use the second step which is to uninstall the Minecraft launcher from PC and reinstall it again. To do this follow the steps below.
- Go to the Windows search bar and type in Minecraft Launcher
- Now, right-click on Minecraft launch and then click Uninstall
- Now, go to Windows store on your PC or use this link https://www.microsoft.com/en-in/store/apps/windows
- Now, search for Minecraft Launcher and click on install, that’s it.
So, uninstalling and reinstalling the Minecraft launcher should also fix the Unable To Update The Minecraft Native Launcher error on your PC.
If you are still receiving the same error message while launching the Minecraft launcher then head to step three below.
Step 3 – Change the Default drive where new content is saved
If you are trying to install the Minecraft launcher in D: drive and getting the Unable to update the Minecraft Native Launcher error when launching then go and change the default drive. To change the drive follow the steps below.
- Go to Windows search bar and type in Storage
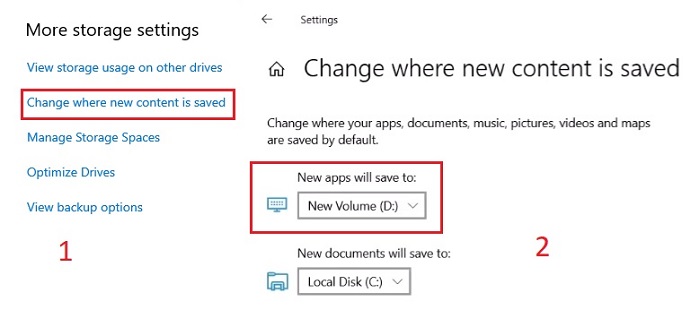
- Now, click on the Storage Options and then click on the option Change where new content is saved.
- Now, under the option, New apps will save to: change the default drive where new content is saved.
- If the default drive is D: then change it to any other drive such as C: drive and then click on Apply, that’s it.
Changing the default storage drive where new content is saved has worked for many players in fixing the Unable To Update The Minecraft Native Launcher error.
Let me know if you found this post helpful in the comments section down below.


