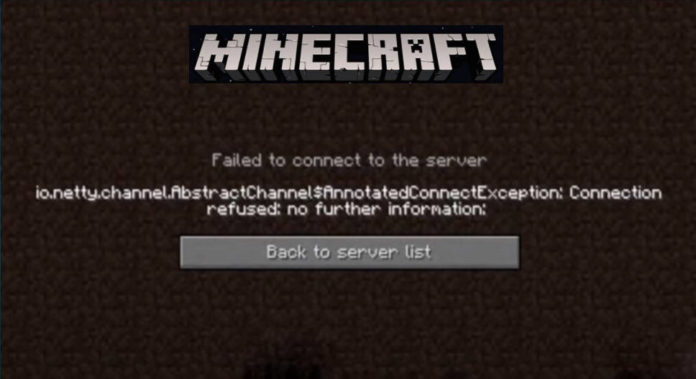
Minecraft players always get an error while connecting to a Minecraft server. This error pops up with the error code io.netty.channel.abstractchannel$annotatedconnectexception. It is found that this error always pops up when connecting your PC or laptop to a Minecraft server. Here is the full error message that users get when connecting their PC to a Minecraft server.
”Field to connect to the server – io.netty.channel.abstractchannel$annotatedconnectexception: Connection refused no further information:”
Some other common errors Minecraft users get are:
internal exception java.io.ioexception, minecraft io.netty.channel.abstractchannel$annotatedconnectexception, io.netty.channel.abstractchannel$annotatedconnectexception connection refused, io.netty.channel.abstractchannel$annotatedconnectexception connection timed out,
Now, where does these errors come from, and when it occurs?.
Sometimes when connecting to a Minecraft server from a PC, the system doesn’t recognize the request you make to establish a connection between your PC and Minecraft server. Sometimes, this error also from the server-side you are trying to connect with.
Now, what is the solution and how to fix io.netty.channel.abstractchannel$annotatedconnectexception error in Minecraft?.
Below we have listed some of the methods which could possibly fix this error while connecting to the Minecraft server. The following methods are the most basic ways which can work to fix most of the connection-related errors in Minecraft, so let dive in.
Point to note before you head over:
- We have tried these methods on PC running with Windows 10 64 bit operating system
- These methods will work with all windows versions like windows 7, windows 8, and 8.1.
1- The first and the easiest method
- Close and Restart Minecraft
- Restart your Computer
- Power off your Router and restart again
3- If the above method doesn’t fix the issue, then try the following methods if you are using Minecraft Java edition.
- Go to Control Panel on your PC
- Now go to Java and click to open it
- From the pop-up window go to the Update tab and click Update Now
If it shows that you have the latest version of Java then simply close the tab.
3- Third method
If all the two methods above don’t work, try the below method. In this method, we will execute some commands using the Command Prompt on your PC.
- Go to search on the below-left corner and type there COM
- Now right-click on the Command prompt and select Run as Admistartor
- Then on the command prompt window type ipconfig/flushdns and hit enter
- Now type ipconfig/release and hit enter
- Then type ipconfig/renew and hit enter again
- Now type ipconfig/registerdns and enter
- Finally, type Exit to close the Command prompt, that’s it.
Now simply restart your PC and the error must now be gone.
Additional methods to fix this issue.
There are other scenarios in which you might get Field to connect to the server error, the first one is when you are connecting to a Minecraft server that you don’t own. The second scenario is when you are trying to connect to your own Minecraft server.
If you are trying to connect to a server that is not yours then the problem is likely not from your side. But, if you are getting the same error on connecting with multiple someone els’ servers then the error might be caused by the Firewall permissions on your PC.
- Go to “Windows Security” by typing it on your search bar
- Now click “Firewall & Network protection”.
- On the next page select look for “Allow an app through firewall” and click on it.
- Now click on “Change Settings”, and click “Yes” on the warning prompt.
- Now, on the same window click on the greyed out “Allow another App”
- Now click Brows and go to the Minecraft folder and select the MinecraftLauncher file and click “Open”.
- Then, repeat the same step again and this time go to the folder “MinecraftServer” and then select both Java executable files and open them.
- Now, on the same Change Settings page scroll down and look for the entries labeled “Java(TM ) Platform SE binary”
- Finally, when you see those entries checkmarks on both “Private” and “Public”
- Now, restart Minecraft and try to connect to the server again.

Check out other Minecraft guides.
- How to Make a Grindstone in Minecraft
- What is Anvil in Minecraft, How to Make or Craft It?
- How to Make a Conduit in Minecraft
- Minecraft Crossbow: All You Need to Know
- What Does SMP and SSP Mean in Minecraft?
- Minecraft Color Codes – Everything You Need to Know
- Planet Minecraft: The Largest Minecraft Community on the Internet


